-
Insulating a LN2 / DI unit and card preperation / mounting the right way
So you just got your shiny new gpu cooling unit and you want to start tearing up the orb with it right away right?? Well here is a little guide to insulating your cooling unit and getting the card prepped and installed in 10-15minutes.
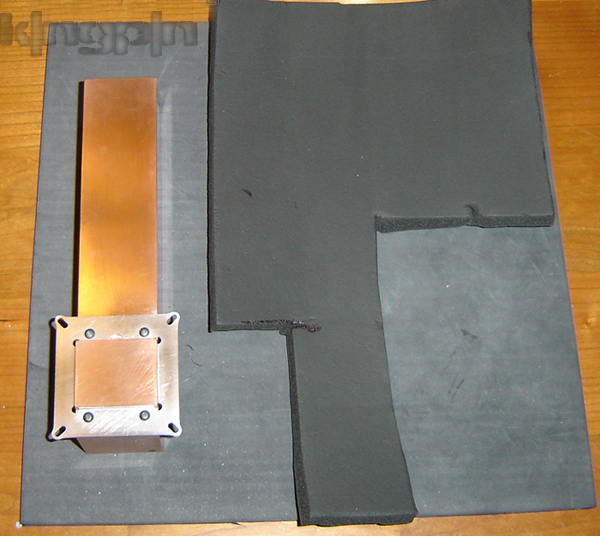
Assuming you already have temp probe installed, here are the tools/ materials that you will use for this job, and also over and over again throughout your benching so dont be shy on stocking up. I have insulated all my vid cards this way for a long time with very few failures for the ammount of benching done:
Foil pipe wrap(lowes or homedepot), clear nail polish, 1/2 and 1/4 foam sheet insulation, foam or electrical tape, and scissors

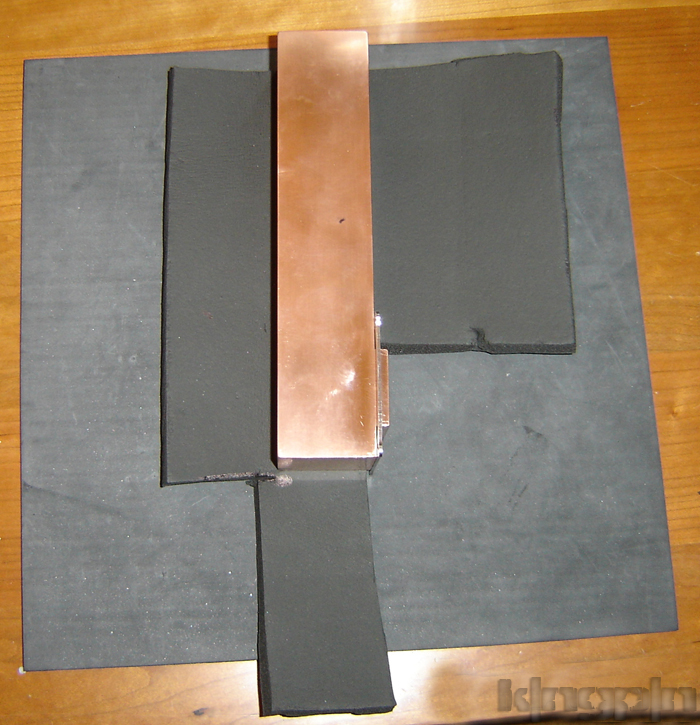
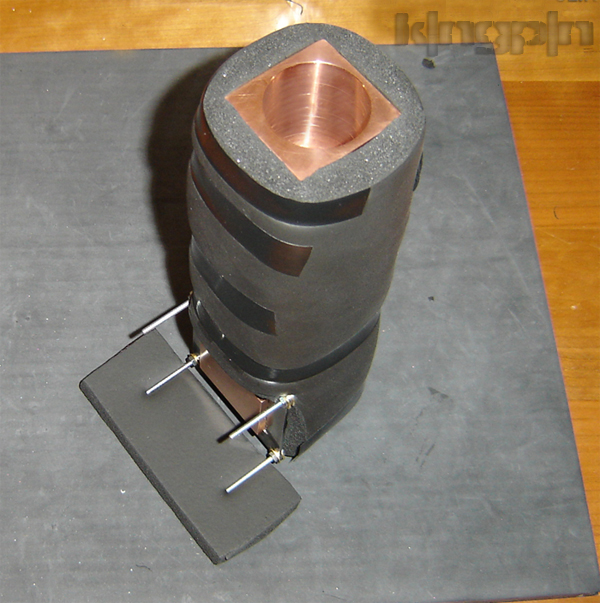
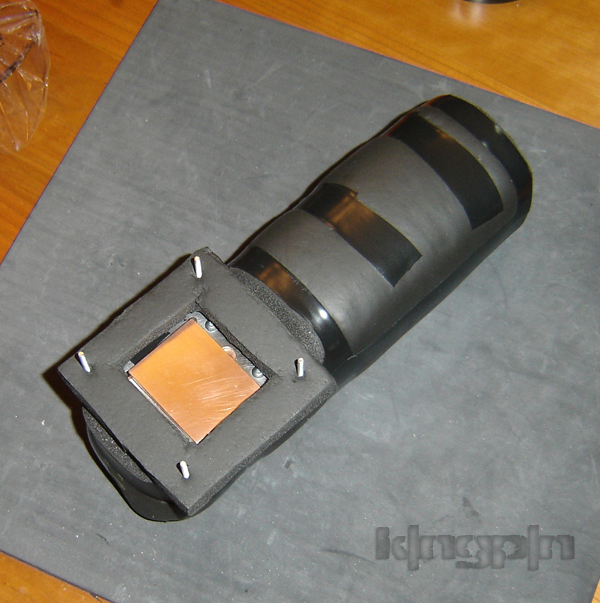
Taking into account the total outer surface area of the gpu unit you are insulating, cut out a piece of 1/2 foam sheet insulation so when folded around the gpu unit, it will completley cover it. With the bigger spacing on 680i, 1/2 works great but 1/4 might work better on the older tighter spaced SLI and xfire mobos:
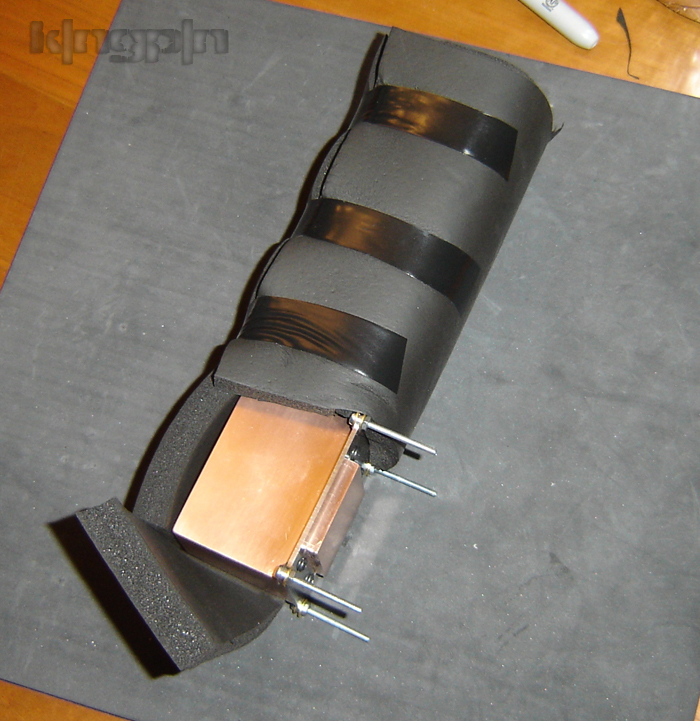
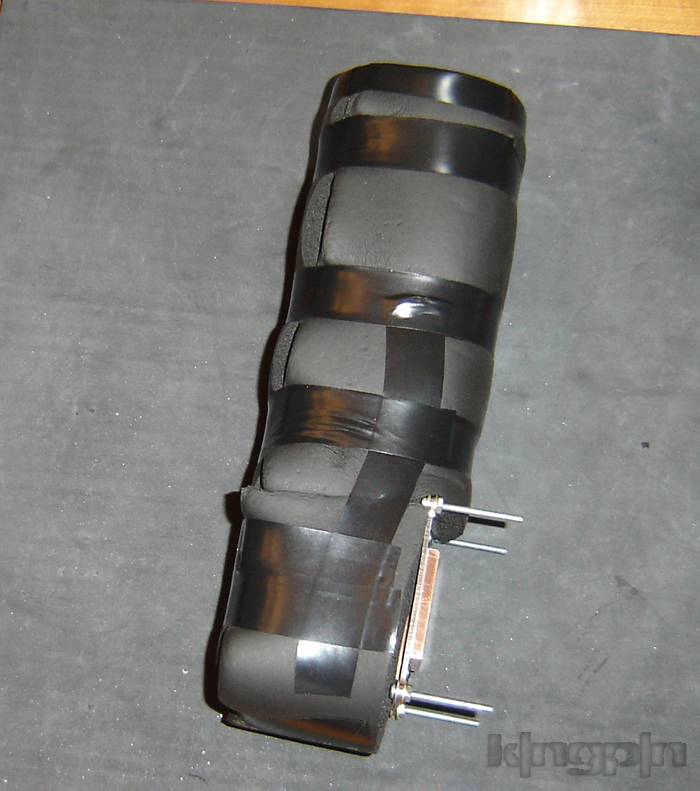
Fold all the sides and tape it off tightly with foam tape or elctrical tape. Just make sure that it is wrapped air tight and your golden:
Before you go any further take the card and apply a light coat of clear nail polish on ALL surface mount components on the back of the card on whole area between ram chips, and on font of card around the core and just above the slot area. You can use any clear polish really, but I find the one that works exceptionally well in protecting against corrosion is "out the door" 
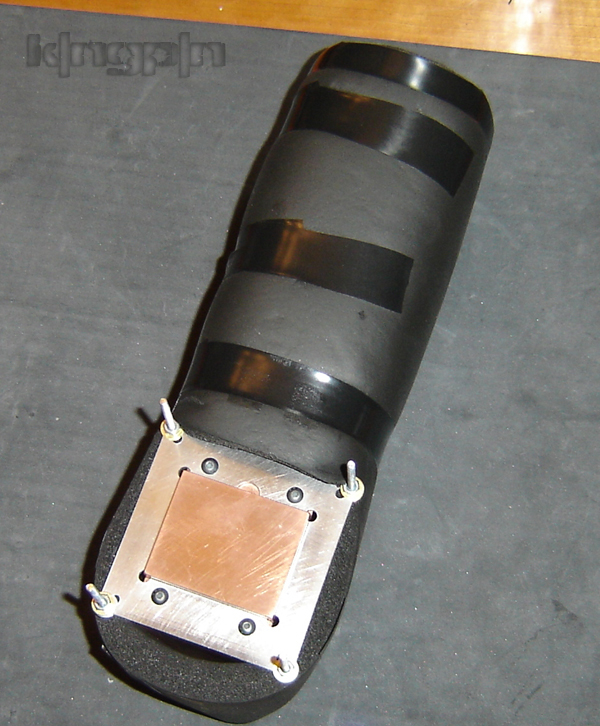
Now we need to make a gasket that will be sandwiched in between the unit and the card where it mounts. This is very important step, as if you can seal off the area around the gpu and make it airtight, you can virtually eliminate condensation in that area. We will also make a backing for the card using the foil wrap at the same time, that will potect the back of the card behind the core from condesation issues.
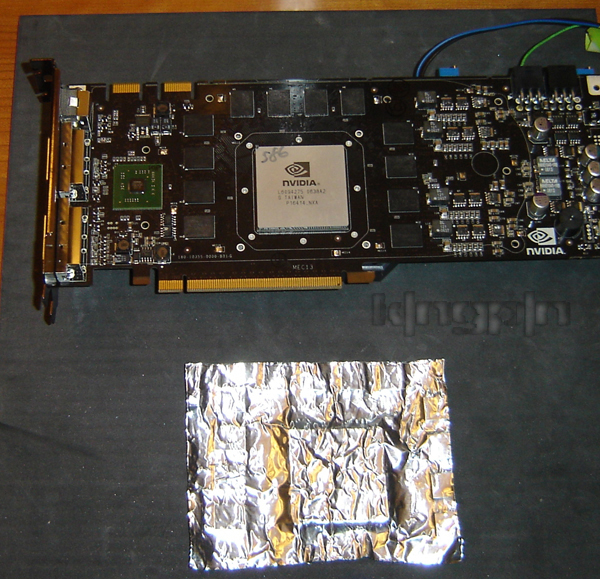
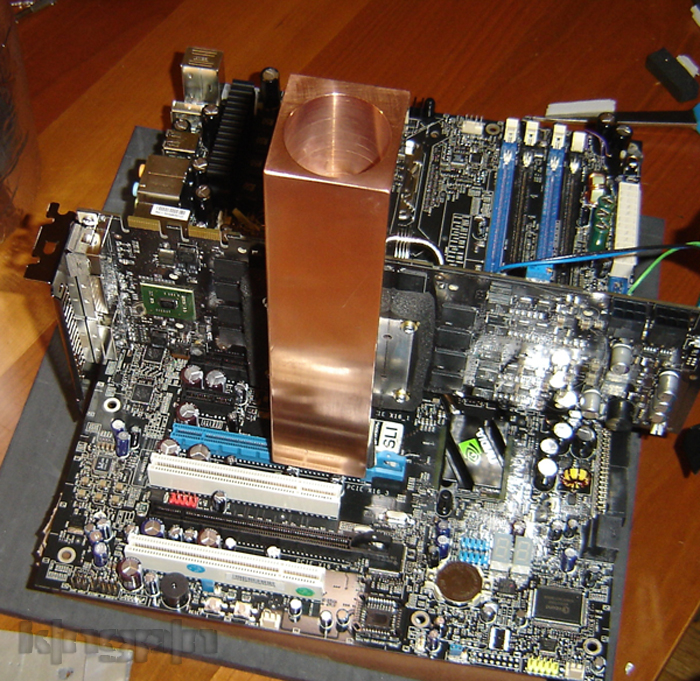
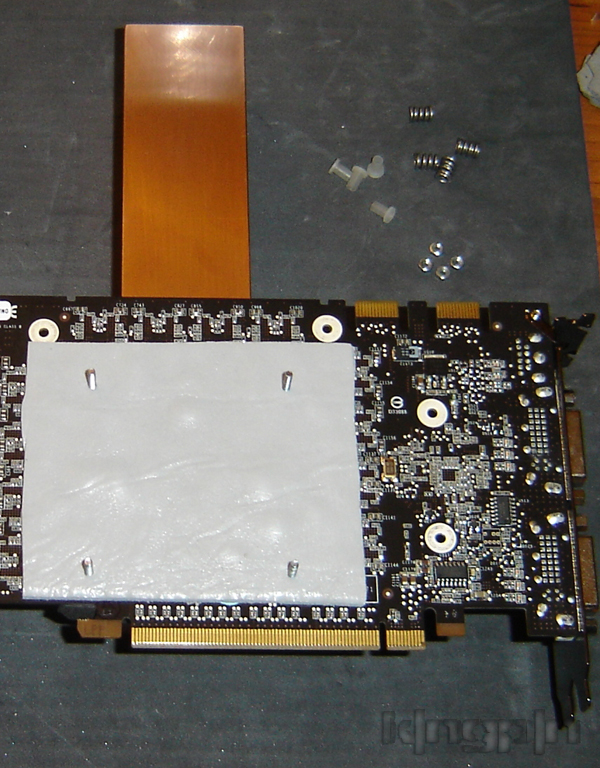
So cut out your card backing from the foil wrap and peel the foil off and stick it on the back of the card (after polish dries) like shown. Of course this guide applies to all vga's/units, but what the heck, we will use a G80 and one of my Tek's for this example :
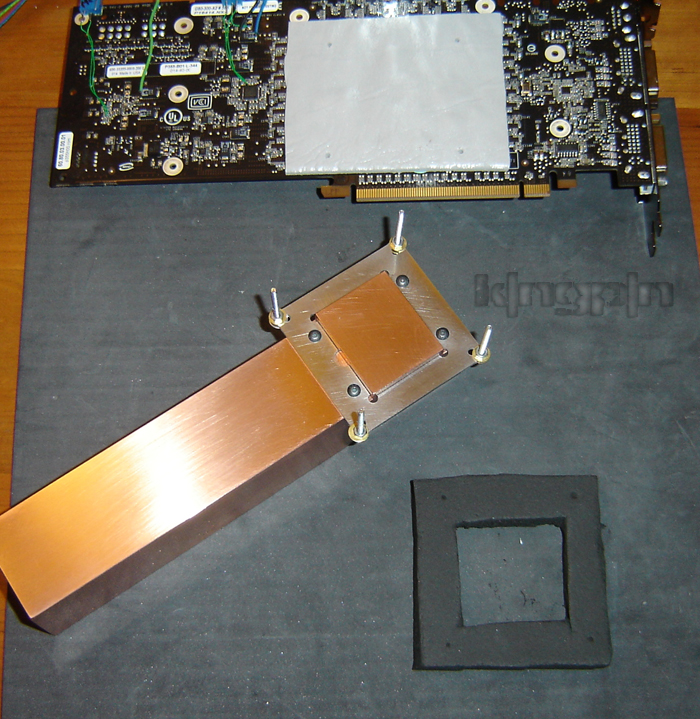
Now here is why I love the foil wrap so much. You can use the foil backing to make an impression of the card core area and create templates for making gaskets out of the 1/2 inch or 1/4 inch foam so they fit perfectly.
Going back to last step, I will use the foil backing from the pad we just stuck on the back of the card for making the imprint of the core area so I can make a perfect fitting gasket. Cut it out of the foil than trace it to the foam:
Here is a pic of the gasket sandwiched between the card and unit for illustrational purposes. You dont want any part of the mounting bracketry to extend out past gasket outer diameter as to be exposed to air:
Unit insulated with the gasket ready to be mounted on G80:
Then all you need to do is apply your thermal grease to the IHS of the card and slide the card onto the unit, again sandwiching the gasket in between the unit and card tightly in the front. I am using uninsulated unit for illustrational purposes again:
To finish the installation, slide on the shoulder spacers, springs and nuts in that order and crank it down till you see the card flex just a tiny bit. This is how I know I have perfect contact pressure. Whatever container or mounting hardware you use, you will still crank it down that tight.
Before you bench, take some dielectric gease and rub it onto to "gold fingers" that go into the pci-ex slot on both sides of the card and your done.
Last edited by k|ngp|n; 03-07-2008 at 01:12 PM.
 Posting Permissions
- You may not post new threads
- You may not post replies
- You may not post attachments
- You may not edit your posts
-
Forum Rules


 Reply With Quote
Bookmarks