

Jin, glad to see you got it all put together and up-and-running.


Jin, glad to see you got it all put together and up-and-running.
Thanks guys, with help from many friends I am finally able to progress on to live load testing. There were some hurdles but I might have gotten over that I think
I really would like to thank RunMC for providing me with CPU and motherboard, NJKid32 for providing me with motherboard and possibly newer version of CPU, Guess2098 for providing me with GPU, and bunch of you guys for helping me figuring out what to do with this motherboard. I forget how fast technology can move in overclocking field
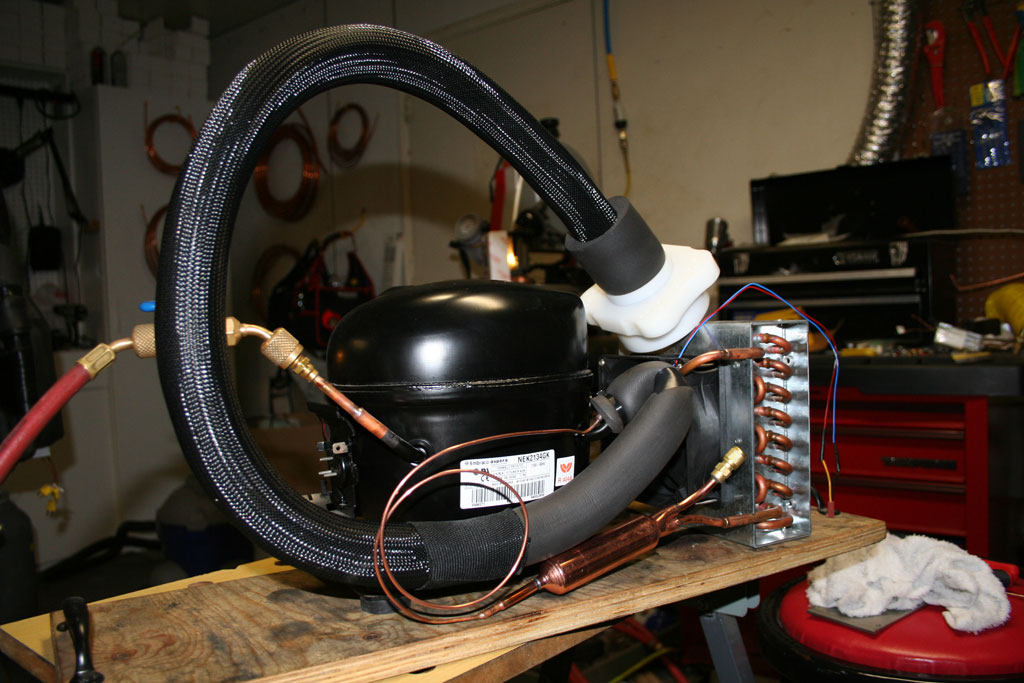
Basically the test will consist of VERY finely tuned NF10FX unit I made while back tuned specifically at 200w with Chilly1 Evap vs the newest NEK2134GK with Cryostar evap tuned for 250w. Of course, once I go beyond that, I am it will be obvious on which one will survive but the real objective here is
#1) Total balance of system given similar noise level and power consumption (which they are) up to 200w load range. Also will look at evap vs cpu delta and few other characteristics that might present.
#2) Typical application of what type of tuning would suit end user the best. Not everyone will enjoy the idea of running 250w load 24x7. (I bet motherboard will blow well before it's time... how do I know? Typically how I used to kill motherboard... some crazy voltage and folding with older systems thinking all is good since evap is cold... it's quite easy to blow up the cap or voltage regulation circuit that way).
Components utilized are Q6600 (I know it isn't G0... something old and supposedly hot)
***correction, it is G0... and runs very cool from testing so far***
, Asus P5B DLX, Very special Team memory (believe was limited production with the so called DDR2 fat body) which I have no idea how to overclock, and of course the 2 phase units
This bench station is finally getting used after resting for nearly 10 months...
Currently running bios set 1.5v reading 1.42v around 3ghz. Going slowly so I know more about the CPU and can compare better... Upping FSB 5mhz every 20 minute can take quite some time :P (I don't think I need the voltage yet but why not)...
Last edited by jinu117; 10-20-2007 at 05:58 AM.
[SIGPIC]http://www.vapoli.com/Images/Forum/vapoli.jpg[/SIGPIC]
Single Stage Work Logs
Originally Posted by killermiller

heatware: jinu117

And the fire extinguisher always in reach at overclocking...
Phase Change Building - made in Germany
Single Stages
Oven brazed Evaps
LianLi V2000 Drop-In Chiller
SC21 Single Stage
Vapochill LS mod.
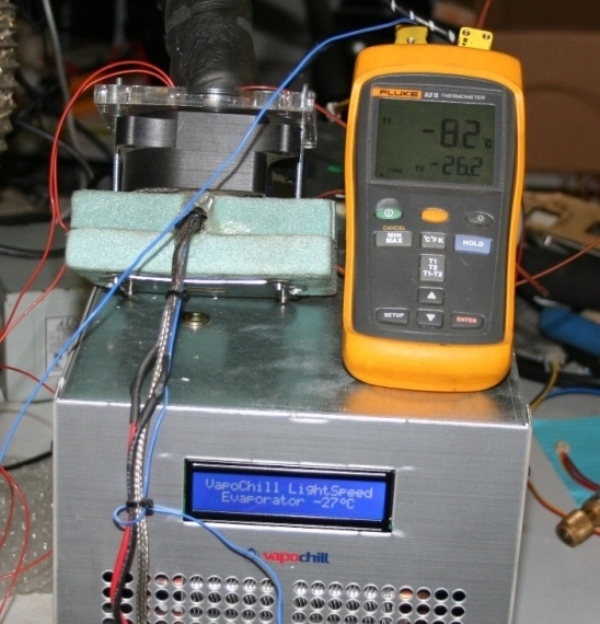
NF9FX utilized and tuned for 220w (yes, there has been more improvement made). Had to sacrifice some temperature for 200w range to get there but after playing with Q6600 G0, I think this will be nicely matched temp/load.
Before: 200w
After: 200w
220w load holding is holding around -34c atm (fluke)
Mach I modified and ready to be shipped out. Bit of playing on this one too, holds 210w on this one. Few changes that wasn't there before went in on this one. Basically, it is easier on compressor as this is RMA replacement unit from one modified mach I repair I have done. I am still not sure what happened to original unit but I will find out when the borked on returns. Typically, I don't do cross shipping but this customer has been EXTRA patient through my ordeal and this is least I could do since I had one unused mach I sitting around. Hope you like it Keith.
Now, this is total rebuild of custom built SS unit. There wasn't any leak I was able to find but customer came in to get it done "professionally" and making it look nice. After quick load testing with 2 customer in my place (yes it was packed, especially with mini-c in there), we find the unit holding beautifully until 175w and than crushing miserably when it hit 200w.
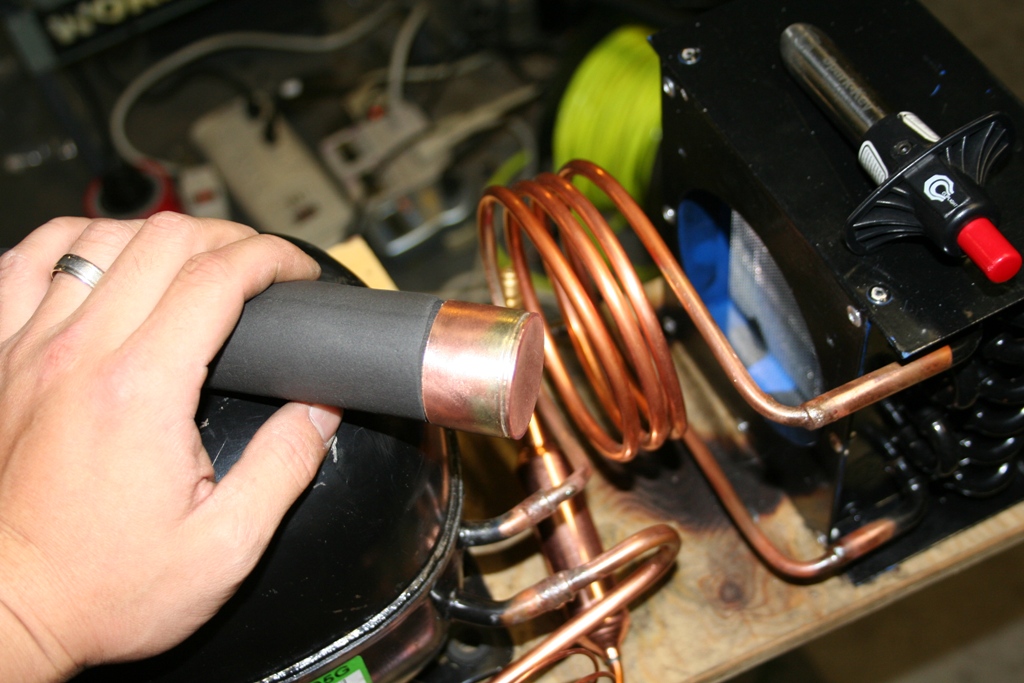
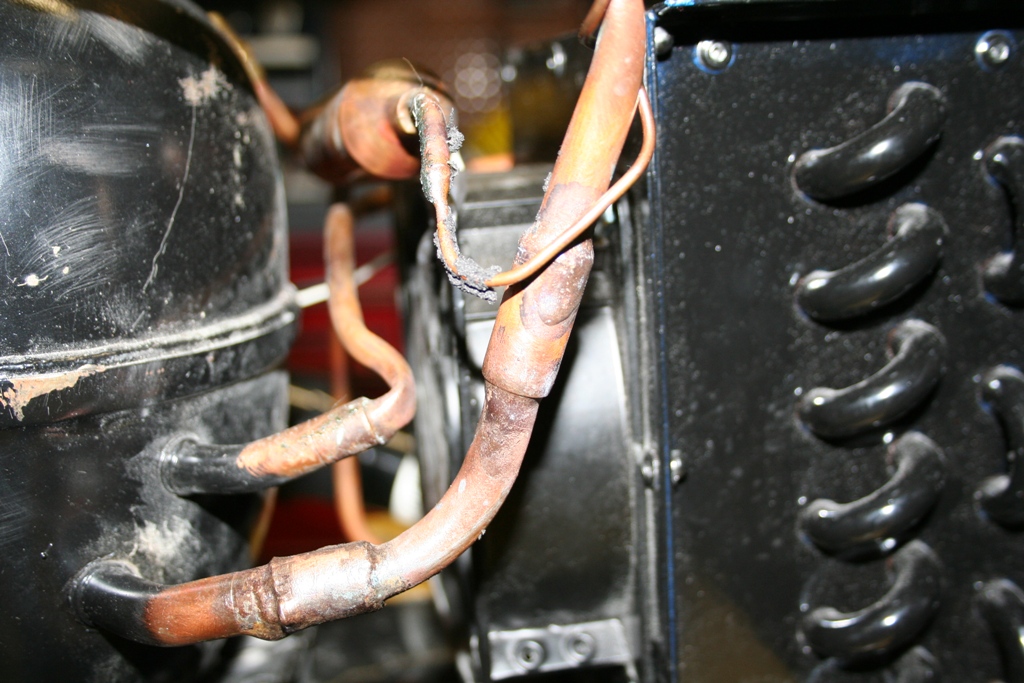
Basically, I salvaged compressor (required oil change 3 times to get rid of some acid present in system), condenser which fan was mounted only on top holes with bolt and nut ... which was loose. Grab some nice case from Under-the-ice and controller and let rework from scratch. Evap we decided not to salvage due to the braze filler filling up all over the place of evap which made it unsuable for the mounting he preferred and potential leak issue later on.
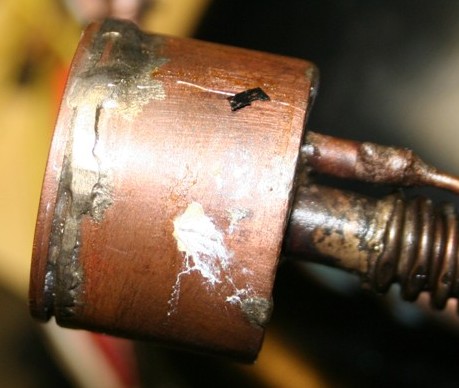
Wish brazing on compressor joint was cleaner but I couldn't get it any cleaner than I got it done right now since it seems like compressor has been rebrazed more than once.
Before:
After:
Before:
After:
Before:
After:
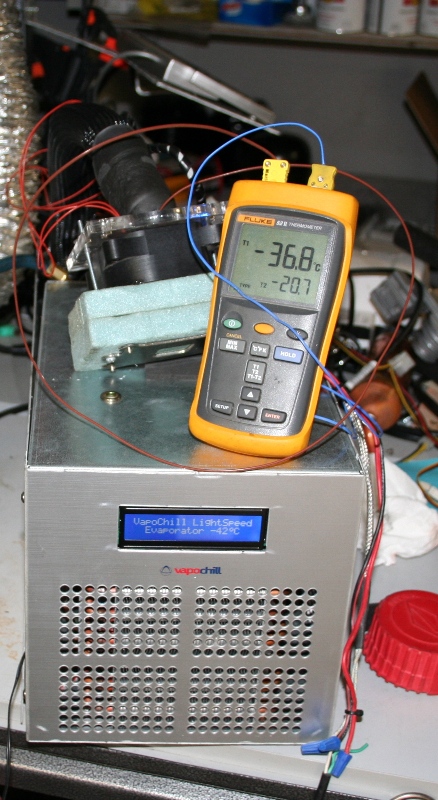
Unit is now tuned for 220w Holding around -37c. NF11FX do dump a little too much heat for this condenser to handle using panaflo M1A so this is best I could come up with with some large desuperheater and some new tricks up the sleeve I have been coming up with.
Customer just picked it up and driving home (probably got there now). I hope he has fun time using this as he mentioned how it already got quieterShould be fun time for him
[SIGPIC]http://www.vapoli.com/Images/Forum/vapoli.jpg[/SIGPIC]
Single Stage Work Logs
heatware: jinu117

Sure no leak?
Digging for pics of that unit before it left my place, but it looks like Tylerdustin totalled that thing before he handed it over. That "thing" didnt even have a 110vac fan on it when it when it left my workshop, nor was that all scratched up. What happened to the braid and heatshrink as well?
Temp above shows the temp it was getting at load. Lack of desuperheater coil was due to the 16" confinement zone he gave me to work in.
Good job Jinu though on the mod, I just wish it would never have had to go to you to begin with! I'll find pics of what it did look like and get them up, as theres no comparison!
Still sitting here wow'ing.
Beautiful now Jinu.

If you have a cooling question or concern feel free to contact me.
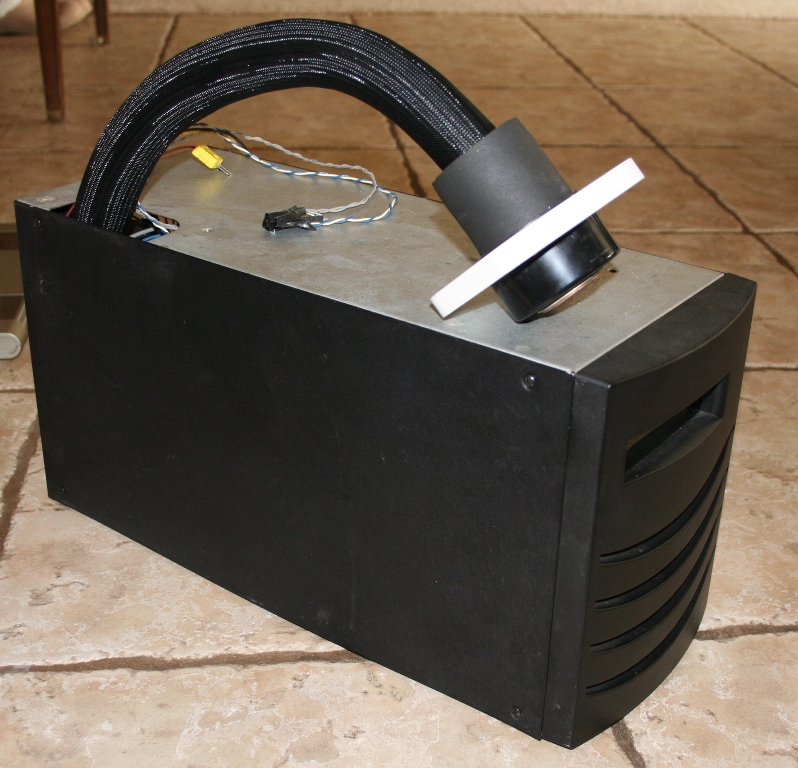
Do you have a picture of the "XtremeSystems Make Over" all closed up.
I think I forgot to... -_-;
Honestly it won't look much diff from what you have on e-bay though... I mean... it's same case, same lcd controller just different enclosure on evap :P Customer preferred the old style for looks... I think the white and black contrast do work well I suppose. Gotta think about color coordination on next enclosure...
The plexi thing on top of vapochill was something I drew up and made in hurry as I didn't really want to retouch the load tester (s939 style). Damned thick and sturdy for sure.
PS) UNSEEN... or Was it Gross? Do you have small length extension cable for the LCD and keypad? I had to chop off some left over from my bad memory of G-froster and used them but it definitely could have been cleaner to have them handy
Last edited by jinu117; 11-11-2007 at 07:54 PM.
[SIGPIC]http://www.vapoli.com/Images/Forum/vapoli.jpg[/SIGPIC]
Single Stage Work Logs
heatware: jinu117
![Send a message via AIM to [XC] gomeler](images/misc/im_aim.gif)
Need to spray that compressor shell
hey jin how ya doin?
which controllers are ya using for your builds?
PS: lovely units as usual
"Study hard my young friend"[/B].
---------------------------------------
Woody: It's not a laser! It's a... [sighs in frustration]
Typically I use LED PID which has been very trustworthy (not a single failure) and k-type reading. When customer specifically asks for LCD (which hasn't happened too often, I look for what is available. I've had too much money tossed down the toilet with that G-Froster (I still have one customer I am trying to get it done right for him... )
I did buy about total 40-50 over time I believe and had to deal with about 20 RMA just on controller part. Whatever left over I sent to Chilly1 while back to help him out since I can't use it on my unit as each controller was costing nearly $500 per controller sold on my end. Considering how many I bought and how many RMAs I had you can do the math on how much I really lost...
Since than, I am very skeptical about these home brewed controllers and stayed away. RunMC recommended this one to me (Freezepack) and I ran some testing and it seems to work fine so far from what I've seen. I also have another controller from forum member here sent for prototype review and feedback from me I am getting ready to check out.
Not quite as refined as freeze pack but seems to have more feature and potential as PCB is home brewed (which was my real complaint about this one but it is protoype after all) and the developer is more keen on listening about need for k-type probe. (it eases up installation so much depending on type of evap... actually on just about all evap).
One thing I would like to see on these controllers are bit different method of clamping down power lines. While those screws do work, it doesn't guarantee 100% safety while in shipment from getting lose. What Mach and vapochill used would be very nice feature to have and also easier to use.
I am getting gibberish now I will stop :P
[SIGPIC]http://www.vapoli.com/Images/Forum/vapoli.jpg[/SIGPIC]
Single Stage Work Logs
heatware: jinu117
Thanks Jin!!

. ss phase . nf11fx compressor . chilly1 evap . r507 . chilly1 condenser . freezepack controller . 965xe 4.63ghz || evga x58 classified || 2x evga gtx 295 || 6gb g.skill 1.6ghz cl8 || corsair ssd x64 || tt 1.2kw w/ 12 awg || win7 x64
Was thinking suction might have been too long but guess not
Last edited by jinu117; 11-12-2007 at 02:54 AM.
[SIGPIC]http://www.vapoli.com/Images/Forum/vapoli.jpg[/SIGPIC]
Single Stage Work Logs
heatware: jinu117
Jakup that wiring is so neat and tidy
Jinu i really like the looks of your enclouser especially the nuts on the end.
Asus COMMANDO -Intel Q6600 @ 3.6Ghz 401x9 have sum test @ 445x9 4GHZ :-)
2x74 Gig Raptors Raid 0..GSKILL 6400 2x1Mb matchd Pair.-OCZ 550w Powerstream adjustable rails- XE2 Vapochill -pioneer Dvd.-2x160 Gig Hitachi ide drives..-Asus 7600 gs video card
http://www.hwbot.org/user.do;jsessio...C3?userId=8636
glad to see you made the jump to phase
wow thats a crazy sick rig!
mentally confused and prone to wandering
Very nice job, both the unit and the PC are nice and tidy.
XBOX Gamertag:Fujimitsu - I'm lonely, be my friend!
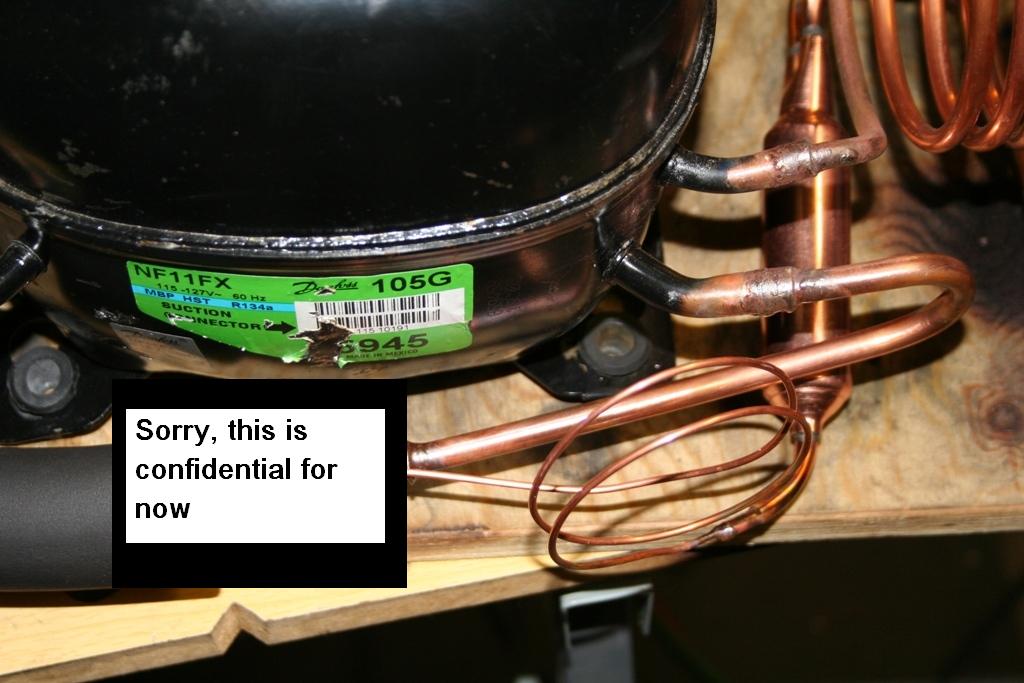
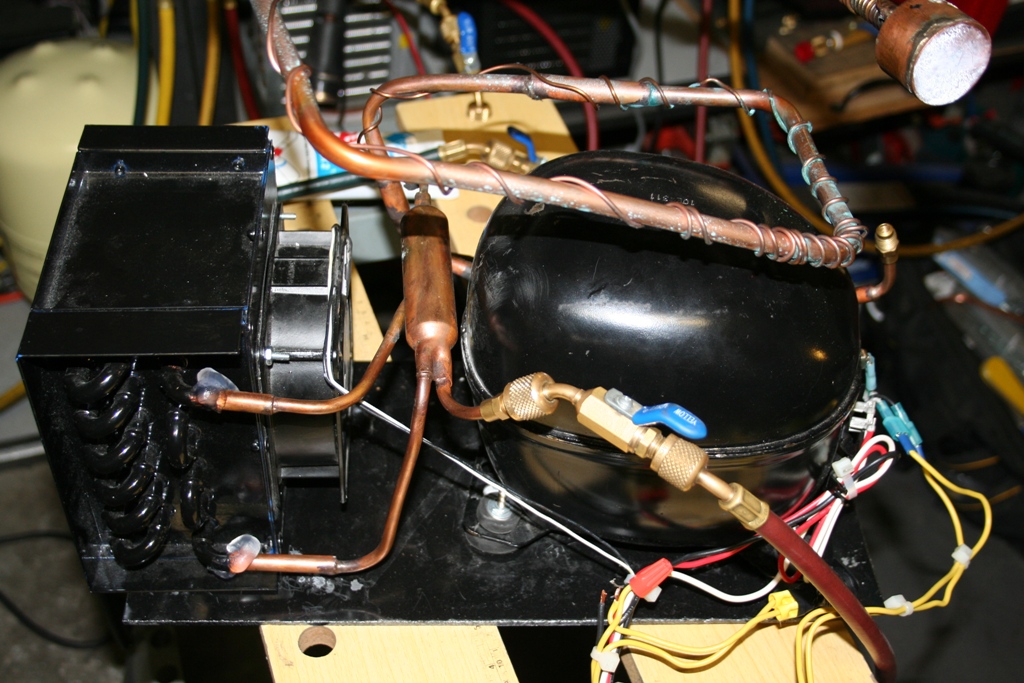
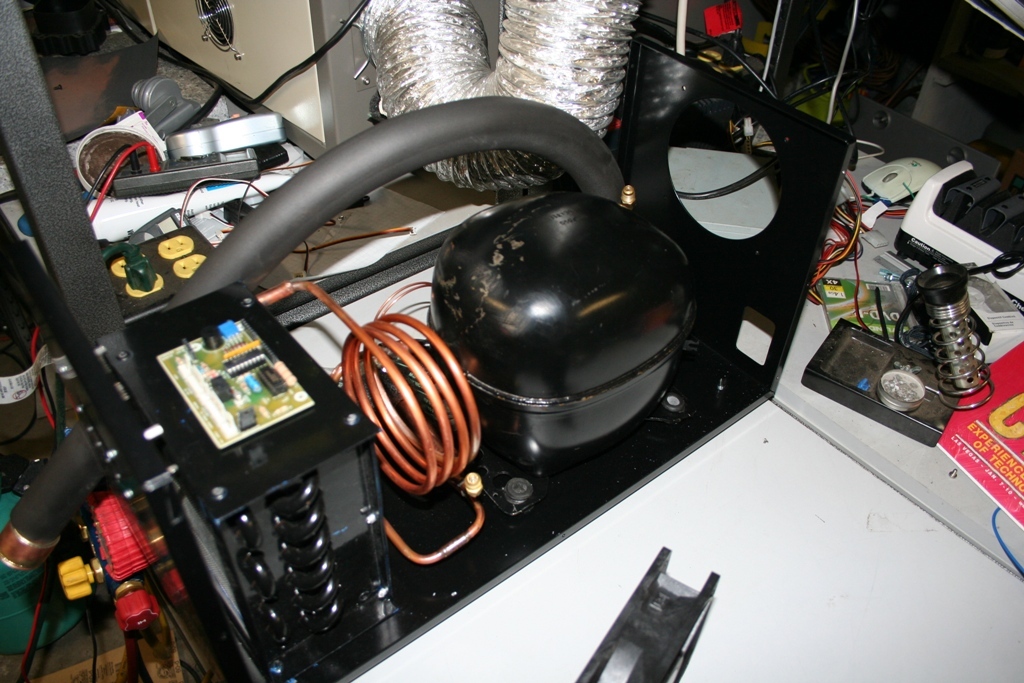
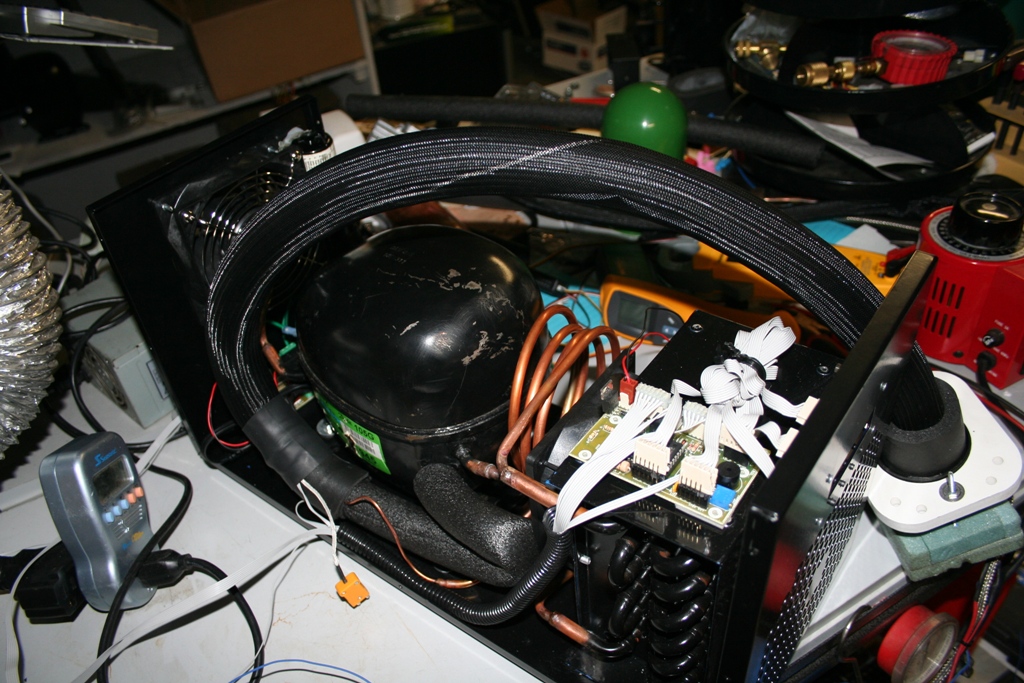
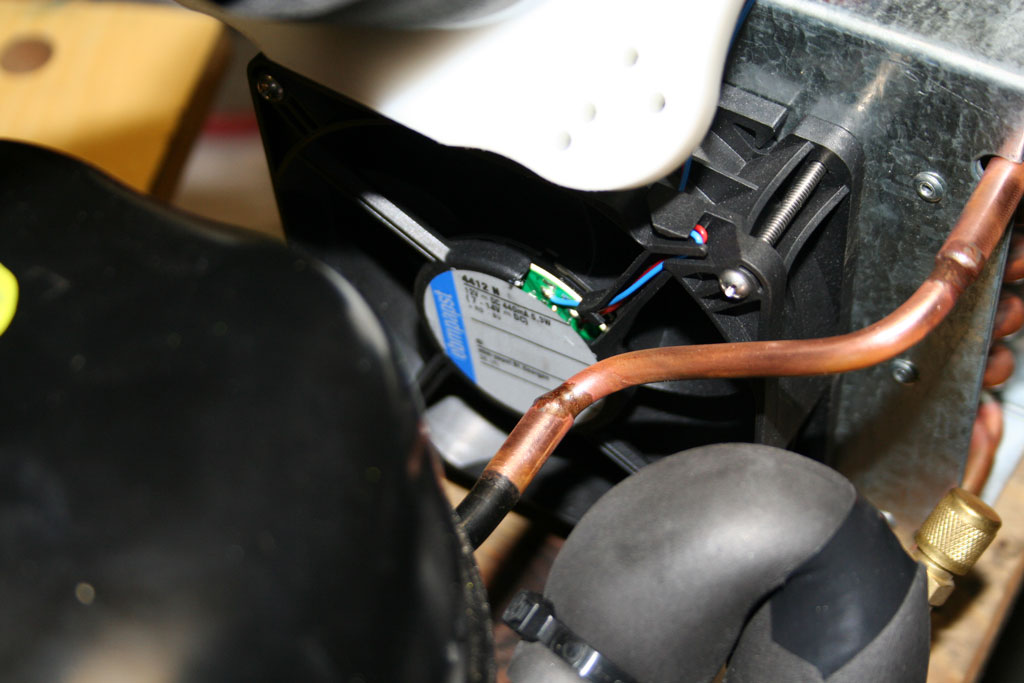
Another SS in build. There was a little bit of delay on getting the evaporator, and additional delay for extreme leak testing to make sure. Now that I came back from vacation, hitting back at it (bet most of you guys didn't notice ehehe). Triple evacing now and load test to start tomorrow.
Cryostar evap, newest condenser in hand, papst fan supplied by customer, and... then confidential stuff in suction line... probably another month or so before I can release it out :P
[SIGPIC]http://www.vapoli.com/Images/Forum/vapoli.jpg[/SIGPIC]
Single Stage Work Logs
heatware: jinu117
[QUOTE=jinu117;2571621]Another SS in build. There was a little bit of delay on getting the evaporator, and additional delay for extreme leak testing to make sure. Now that I came back from vacation, hitting back at it (bet most of you guys didn't notice ehehe). Triple evacing now and load test to start tomorrow.
Cryostar evap, newest condenser in hand, papst fan supplied by customer, and... then confidential stuff in suction line... probably another month or so before I can release it out :P
[QUOTE]
wonder how that one will work to the one on the way
all I know is i can't wait to start it up.
Silverstone FT02
Asus Maximus III Formula, Intel i7-875k, Corsair 4x2gb Dominator 1866mhz
SLI EVGA GTX 580s, PCI-E X-Fi Audio
2x WD Raptor 600gb sataIII Raid 0, 2x1tv WD SATA Black Raid1
Thermaltake W0133RU 1200W
Windows 7 Ultimate x64, Dell 2310 3d lcd
hey jin have you ever considered putting some arctic ceramique on your cap tube? I've seen drew do it on multiple occasions and he apparently claims it gets you even more sub cooling/increase the load. Of course the return probably won't be as much as soft soldering, but something tells me it wouldn't be worth it to soft solder the cap tube onto the suction line
ex
http://forums.extremeoverclocking.co...50&postcount=9
Holy cow on what drew did... geez... I don't think I enjoy the idea of that much mess.
Partially, it is working on same thing but different approach
[SIGPIC]http://www.vapoli.com/Images/Forum/vapoli.jpg[/SIGPIC]
Single Stage Work Logs
heatware: jinu117
I mean if you think about it will offer better thermal conduction from the suction line to the cap tube, but I have no idea how much of a gain it will offer for the mess
Keep in mind problem we have often is also flood back
Subcooling in this case is almost like balancing factor in a sense due to some constraints on what we have for such wide varying load condition we design for.
Evaporator, cap length, short suction length, and need for varying load. Subcooling actually impacts what happens in balance of system more so than just straight load handling
[SIGPIC]http://www.vapoli.com/Images/Forum/vapoli.jpg[/SIGPIC]
Single Stage Work Logs
heatware: jinu117
True, so if you were to do that, would you need a longer cap tube for the same amount of load?
Not necesarily.
Given same cap tubing, more subcooling will enable higher capacity in general. Is it increased efficiency? Hard to say since heat doesn't just disappear
The benefit of right amount subcooling in our scenario deals more with floodback issue in my opinion.
I rarely use suction accumulator in single stage...
[SIGPIC]http://www.vapoli.com/Images/Forum/vapoli.jpg[/SIGPIC]
Single Stage Work Logs
heatware: jinu117
Yeah I originally bought one of those cheap nf11fxs off ebay for like $46 shipped and did not plan to use a suction accumulator, but then I found a free used (but looks like new) dehumidifier that has a powerful rotary with a variable switch to control it. So since the rotary is already all wired up I'm not going to bother to put in the danfoss not to mention I can just turn down the power being fed to the compressor to reduce the noise level of the compressor (I've already ran it before to see if it works and it is virtually silent at the mid to low levels)
 Posting Permissions


 Reply With Quote
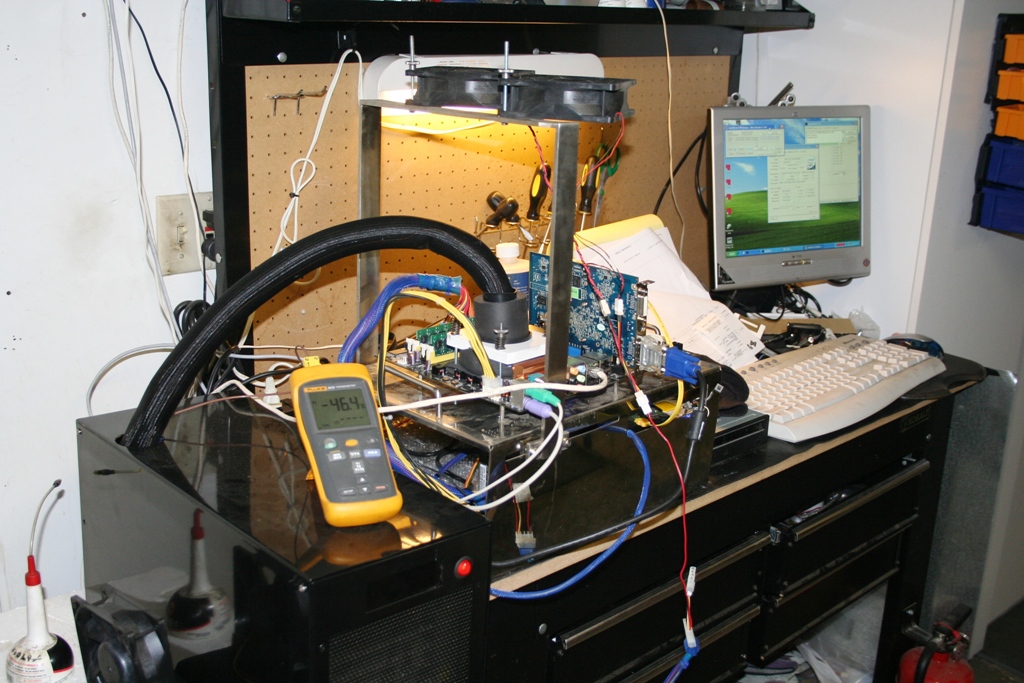

 is the remedy

Bookmarks